3D CAD and Unity - how to combine the two worlds?
If you have been exploring the ways to bring your CAD data into the Unity, this blog post could possibly help you navigate your way. We will try to summarize available options and give particular recommendations. We will specifically focus on unique CAD Exchanger SDK features you could leverage to build your CAD-enabled apps.
This post will be most helpful for software developers who plan to or are already developing their 3D apps on top of Unity and face challenges to work efficiently with 3D CAD data. Hopefully, developers from adjacent universes of Unreal Engine by Epic Games and CryEngine by CryTek (and possibly others) may also find this post useful.
Why CAD in a game engine?
Game engines adoption has moved beyond the game world for quite some time, and such giants as Unity and Epic Games now move significant focus on catering to the needs of engineering and manufacturing.
Game engines are utilized for building realistic virtual environments in design and industrial workflows, ranging from marketing materials creation to remote maintenance performance, from customer-oriented product configurators to immersive collaborative design reviews.
Automakers such as Volkswagen, Toyota, BMW bring their design reviews into the Unity-powered scenes for more realistic visual feedback and immersive user experience.
AEC/BIM users can create augmented reality (AR) solutions with Unity Reflect to bring tablets with Unity onto construction site to preview future buildings in the actual landscape.
3D app developers are captivated by visualization and AR/VR capabilities offered by the game engines and look for ways to work with their engineering CAD data with the help of these platforms.
So, how to close that gap and bring your 3D CAD data into the Unity game world?
Before we dive into that, let’s review two key modes the Unity operates in - edit and play (or run-time), and two distinct 3D data representations - mesh and B-Rep.

What is Unity edit mode?
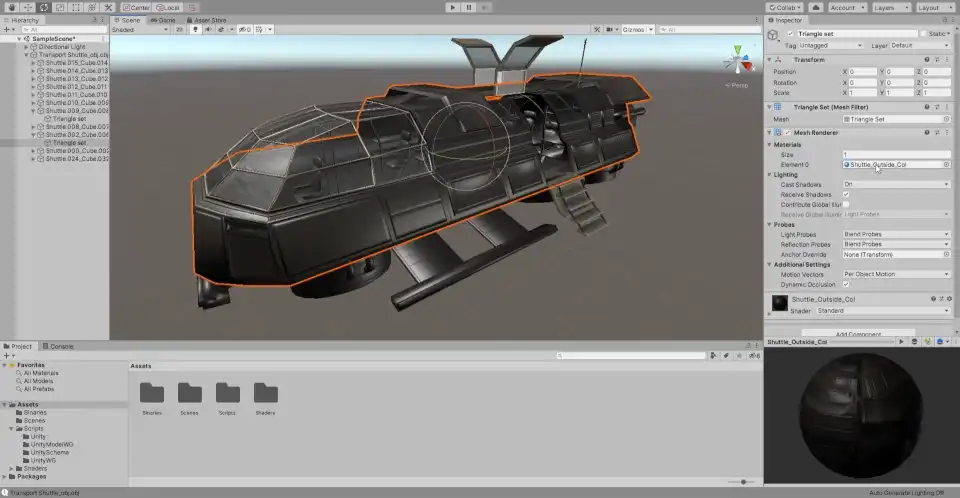
While in the edit mode, the user or developer provides 3D objects (called ‘assets’) to be prepared and integrated (‘baked’) into the Unity scene.
For instance, for AR/VR apps for some training simulations, these assets can include 3D models of the equipment and tools. For automotive design review apps, it could be the car interior elements coming from CAD systems.
Preparation may incorporate proper locating of the light sources, positioning of the 3D objects, applying textures to them for superior rendering and immersive experience, and so on.
Once the scene is ready, the application can use these prepared assets (called prefabs) in the run-time.
What is Unity play (run-time) mode?
In the play, or run-time, mode the user interacts with the prepared scene: moves the 3D objects along the scene, changes materials or lights (e.g., to see effects of the changing environment).
In some cases, the app’s workflow may require the user to introduce new 3D objects into the scene - for example, a particular part or a tool into the virtual training. In the AR app, when the user is in the field on the construction site, we can even imagine a need to immediately update the 3D model of the house right inside the app.
In complex scenarios, producing a new version of the digital 3D model may likely require an update of its original design in the CAD system used to create it and thus its re-import into the Unity scene.
How are 3D models defined?
It is vital to recall (or to learn!) that 3D models are described with the help of two fundamentally different representations.
Game engines have traditionally used the polygonal mesh representations, where a 3D model is represented by a set of triangles (or more complex polygons). This approach provides a simplified facetted (tessellated) representation but is just fine for visualization workflows as well as many others (e.g., 3D printing).
On the other hand, CAD design workflows (mechanical and architectural in particular) are based on using precise B-Rep representations. In this approach, the 3D model is represented via precise geometrical definitions of surfaces and curves (circles and ellipses, cylindrical, conical, and NURBS surfaces, offsets, etc.). B-Rep provides precise and compact definition but is effectively unusable for visualization.
Description of which CAD format uses which representations is available in this table.
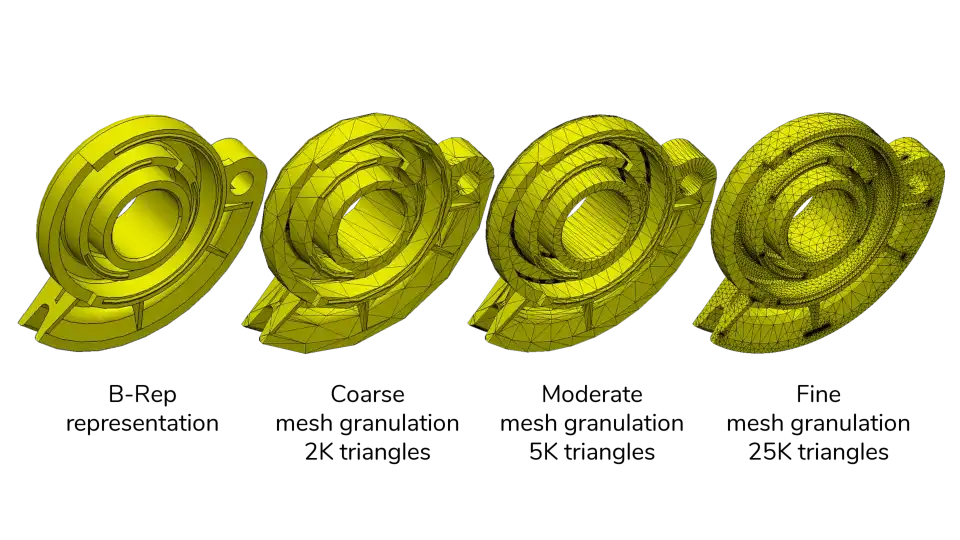
Going from the B-Rep definition to the polygonal one involves triangulation, which can be done with different levels of approximation and thus can produce different meshes (or levels of details). Importing a precise CAD B-Rep model into the Unity world certainly involves triangulation, if a tessellated representation is unavailable.

How to import 3D CAD into Unity?
Now, with an understanding of the two fundamental modes and two principal 3D data representations, let’s move further.
To import 3D CAD data into Unity, you can use the following options:
- Prepare your CAD data into the formats natively supported by Unity and import it using Unity itself.
- Use the PiXYZ plugin (promoted by Unity due to their partnership agreement). PiXYZ sits on top of third-party technologies and provides a bridge to Unity.
- Use CAD Exchanger SDK / Unity plugin to seamlessly import 3D CAD into Unity.
Using interim formats natively supported by Unity
Unity itself has a limited number of supported formats: .fbx, .dae, .3ds, .dxf, and .obj. Unity enables importing files in these formats in the edit mode only, so if your workflow does not involve run-time importing, this can be the simplest way to go.
If your CAD design system supports saving in one of the above formats, then just do it. If you receive CAD designs from your suppliers or users, then you may need a third-party tool to do this conversion.
If you need to sporadically convert your CAD data, then you could resort to CAD Exchanger Lab (on Windows, macOS, or Linux). For regular batch conversions, you could try CAD Exchanger Batch to automate your process:
ExchangerConv.exe -i C:\input\engine.jt -e C:\output\engine.fbxOf course, beware that not all of these formats are capable of transmitting the original design to a full extent (due to the format's own limitations). For instance, the OBJ format does not support assemblies, so your hierarchical CAD assembly will be just converted into a single flat list of multiple instanced parts, leading to loss of hierarchical information and memory bloat.
Secondly, take into account possible Unity’s limitation on the correct import of the data. We have talked to several customers who used CAD Exchanger to convert data into FBX and complained that Unity did not respect materials and hierarchy after importing, although the generated FBX file was correct (as proved by native FBX viewer from Autodesk and back import into CAD Exchanger).
Using PiXYZ Plugin for Unity
To their credit, PiXYZ has focused on closing the gap between the CAD and the Unity world probably from their start. However, developing own technologies to access 3D data in CAD formats can be prohibitively expensive. For comparison, CAD Exchanger is one of fewer than a handful of independent providers in the world who offer these technologies. We have been investing dozens of person-years every year to develop and enhance them.
So PiXYZ had to choose a sub-licensing business model and to sit on top of already available third-party CAD conversion technologies. Unity entered into the partnership agreement with PiXYZ and gave it full marketing support, including endorsing it as a “recommended way”.
Despite PiXYZ’s focus on Unity-specific features (which is its true added-value), its dependence on third-party technologies enforces limitations and transfers burden onto the developers considering this PiXYZ offering. The royalty-based licensing model leads to inflated per-seat prices, which is less affordable to Unity/CAD developers who might be interested in bringing CAD into Unity.
We have talked to multiple customers who underlined that PiXYZ’s pricing model does not align well with their budgets or own licensing models.
At the time of this writing, it seems that PiXYZ has restricted its license to edit mode, although we did receive feedback from prospects referring to its run-time license available in the past at an extra fee. PiXYZ’s price point is in the order of a few hundred US dollars per end-user’s seat.
Using CAD Exchanger SDK / Unity plugin
To address this need of crossing the CAD-to-Unity gap, we at CADEX have recently released a specific module CAD Exchanger/Unity plugin listening to the feedback of prospective users.
For software developers, we provide CAD Exchanger SDK, which is a set of C#, C++ and Java libraries to read/write, create, explore and visualize CAD data. CAD Exchanger is used both by startups and Fortune-100 companies.
By the time of this blog writing, our list of supported formats covers over 20 CAD formats and more are underway. The list includes JT, STEP, Solidworks, Rhino, and many other neutral and native file formats. So even today Unity/CAD developers’ most practical needs can likely be addressed.
CAD Exchanger SDK / Unity plugin was initially released in June 2020 and was focused on run-time support, the feature most requested by our prospects. Edit mode import became available in December 2020. The supported scope covers all components, from assembly structures to B-Reps and texture mapping.
Thanks to our control of the technology stack we have far greater flexibility in defining the licensing model.
CAD Exchanger SDK / Unity plugin not only converts CAD data into Unity’s GameObjects but also provides full C# API to our unified data model for more feature-rich and deep data access (including assembly traversal, geometry exploration, computations, etc.).
CAD Exchanger SDK provides a very flexible pricing structure, per individual formats or through cost-effective bundles.
We see a lot of interest and are in conversation with multiple software developers interested in this technology. In particular, eachTick company successfully based their Virtufy app for virtual presentations on CAD Exchanger SDK (read case study).
Please contact us for more details, if interested.
"CAD Exchanger does a truly marvelous job of run-time importing CAD data into Unity and therefore allows us to focus our resources on making Virtofy the best app it can be."

|
Comparison
The following table summarizes the three options considered above:
| Native Unity | PiXYZ | CAD Exchanger | |
|---|---|---|---|
| Licensing | free | Per end-user’s seat | Per application |
| Supported modes | Edit only | Edit / run-time(?) | Edit and run-time |
| Supported CAD formats | Basic mesh-only formats | Most CAD | Most CAD |
| Assemblies | Limited | Yes | Yes |
| Meshes | Yes | Yes | Yes |
| B-Reps | No | Yes | Yes |
| Materials and textures | Yes | Yes | Yes |
| PMI | No | ? | Yes |
What 3D data can you import into Unity with CAD Exchanger?
CAD Exchanger / Unity plugin converts any CAD format into a unified data model (ModelData_Model class) which contains:
- Product structure (assembly hierarchy)
- Geometry (B-Reps and meshes)
- Meta-data: Names, id’s, materials, textures, colors
- PMI (Product and Manufacturing Information)
This ModelData_Model is further converted into the GameObject, basic class for all entities in Unity scenes. For data integrity, ModelData_Model is mapped to Unity objects as follows:
- The geometry is stored in Unity.Mesh and mapped with a MeshFilter component
- Product structure is mapped to the hierarchy of GameObjects, implemented via parent-child relationships
- Appearance attributes (materials, textures, colors) are converted to Unity.Material and mapped to mesh with MeshRenderer
It is also possible to control the import process:
- Scale the model with simple entering the scale factor
- Render using a custom shader
- Converted B-Rep to meshes with different granularity setting, from fine through medium to coarse
- Decimate imported meshes to get lighter 3D models, reducing the number of triangles from dozens of thousands to thousands
- Edit models
- Compute properties
How to integrate CAD Exchanger Unity plugin?
CAD Exchanger public API consists of only two classes which makes it easy to sort out in five minutes time:
- Unity_ObjectFactory, including Create, setter and getter method – to launch conversion
- Unity_ObjectFactoryParameters – to adjust conversion parameters
So in fact you create Unity_ObjectFactory, call Create method, launch conversion - and that’s it.
The SDK package includes two examples to demonstrate Unity module functionality:
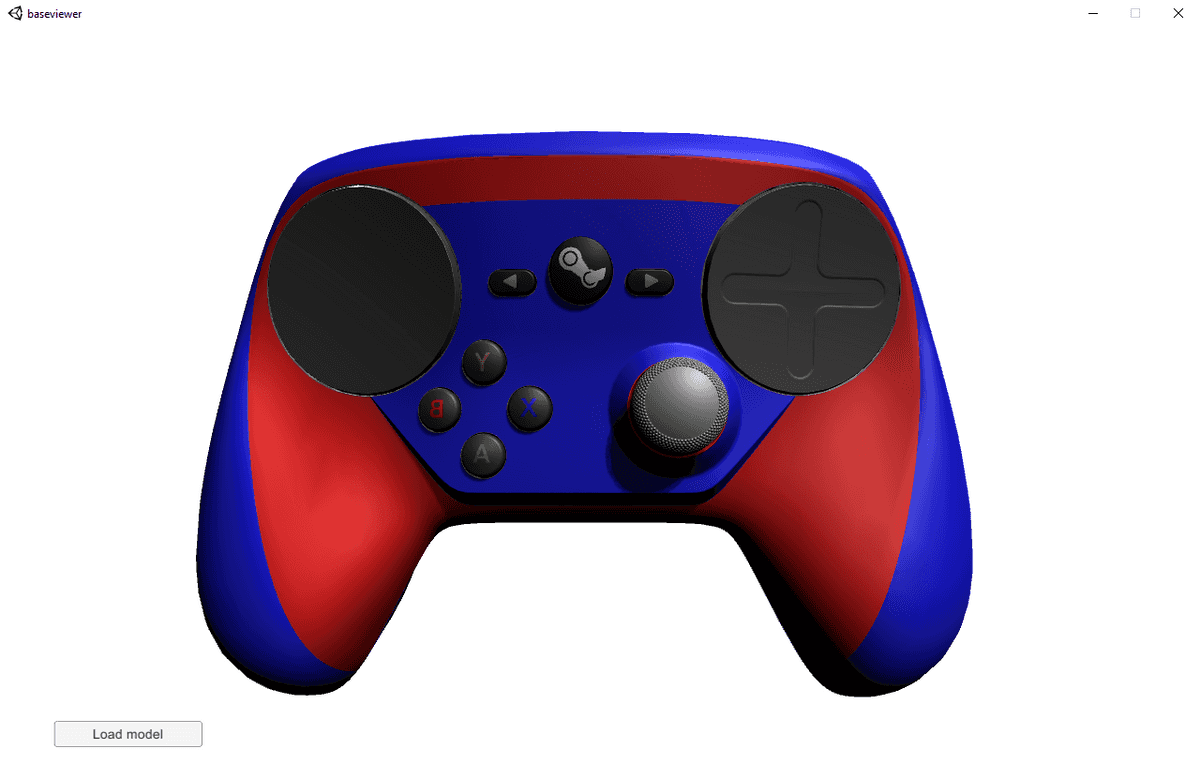
- Unity Base Viewer Example - reads an external CAD file and translates its contents into Unity objects at runtime
- and Unity PMI Viewer Example - the same but with PMI data import

Both appear as simple models viewer with a single button "Load model". By clicking on it, the end-user gets access to the file system, chooses the model to load and gets it imported into the app’s work area.
You may insert the example’s source code into your application and modify as needed:
ModelData_Model aModel = new ModelData_Model();
        STEP_Reader aReader = new STEP_Reader();
        aReader.ReadFile(new Base_UTF16String(thePath));
        aReader.Transfer(aModel);
        Unity_ObjectFactory aFactory = new Unity_ObjectFactory();
        Shader aCustomShader = Shader.Find("CustomShaderName");
        aFactory.Parameters().SetShader(aCustomShader);
        aFactory.Parameters().SetScaleFactor(10f);
        string aModelName = Path.GetFileName(thePath);
        var aResultGameObject = aFactory.Create(aModel, aModelName);
Basic integration
using cadex;
using UnityEngine;
...
STEP_Reader aReader = new STEP_Reader();
aReader.ReadFile(new Base_UTF16String("MyModel.stp"));
//convert STEP to MDM
ModelData_Model aLoadedModel = new ModelData_Model();
aReader.Transfer(aLoadedModel);
//convert MDM to GameObject
Unity_ObjectFactory aFactory = new Unity_ObjectFactory();
GameObject aTarget = aFactory.Create (aLoadedModel, "MyModel.stp");
...
A typical workflow
Test-drive CAD/Unity integration with CAD Exchanger SDK
If you are developing a Unity-based app and considering working with CAD data, I’d like to invite you to test-drive our CAD Exchanger/Unity integration module.
For that, just go to the CAD Exchanger SDK page and click the “Try for free” button. Please do share your feedback with us to help us make this product a greater tool for all Unity developers willing to bring CAD data into their apps.
Thanks for reading!
Learn more: